


In short
- Tasi Home Studio Full 3D artificial Christmas trees come pre-assembled: the branches are already attached to the trunk, so you don't have to attach each branch one by one. The tree comes in several sections that you join together from the bottom up, then unfold and fluff the branches.
- Fluffing takes the longest: from the bottom up, from the inside out, directing each branch tip in a different direction so the trunk is not visible.
- After the holidays, pack it away in reverse order, gently bringing the branches close to the trunk, and store it dry, in the original box or in a storage bag, without anything placed on top of it.
Assembling an artificial Christmas tree can seem like a whole day's work, with branches scattered around the living room and instructions that are difficult to follow. A pre-assembled tree is much simpler: you set up the stand, join the sections, and then shape the branches. Below you will find the steps in order, the mistakes that ruin the tree's appearance, how to pack it away after the holidays, and how to store it so it looks just as good next year.
Do I have to attach the branches of the artificial Christmas tree one by one?
No, on Tasi Home Studio Full 3D trees, the branches are already attached to the trunk; you just join the sections and unfold the branches.
There are also artificial Christmas trees where each branch is attached separately to the trunk, in order of size, and assembly really takes time. The models in our collection, Versailles, Lapland, Milan, and those with natural long wire, in the 180, 250, and 300 cm versions, do not work this way. You take the sections out of the box with the branches gathered toward the trunk, and on the LED models, the lights are already on the branches. I have written extensively about the advantages of this type of tree in the article pre-assembled artificial Christmas tree.
What should I prepare before opening the box?
The ceiling height, a place for the tree, and a few things within reach: a clear surface, thin gloves, and a little quiet time.
- Measure the ceiling. The tree needs space at the top: leave about 20–30 cm between the top of the tree and the ceiling. If you are still choosing the height, the complete rule is in the guide to choosing an artificial Christmas tree.
- Choose the location. Away from a radiator, fireplace, stove, or fan blowing directly toward it, and with an outlet nearby if the tree has LEDs or if you are using garlands. Also think about where people walk: the tree will widen considerably after fluffing, so choose a base that is wide enough.
- Clear the floor. You need space around the tree to reach the branches on all sides. Move the side table or armchair before, not after.
- Prepare thin gloves. They are useful for any tree, as artificial needles can easily scratch the skin, and mandatory for snow-covered models so you don't rub the snow off the branches. For snowy trees, you will also find special steps in the article about the artificial Christmas tree with snow.
- Keep the box. Unpack it carefully, without cutting the cardboard: it is the easiest place to return the tree to after the holidays.
How do you assemble the artificial Christmas tree, step by step?
The stand on a flat surface, the bottom section in the stand, the other sections joined one by one, then fluffing, checking, and decorating.
| Step | What to do | What to pay attention to |
|---|---|---|
| 1. The stand | Unfold the tree stand and place it exactly where the tree will stand | The floor should be flat; on a thick rug, the tree may tilt |
| 2. The bottom section | Secure it firmly in the stand | Make sure it stands vertically and does not move before you add the rest |
| 3. The other sections | Join them one by one, from the bottom up, to the top | Each section should fit completely into the one below it |
| 4. Fluffing | Unfold and shape the branches, from the bottom up | From the inside out, directing the tips in different directions |
| 5. Checking | Look at the tree from several angles | Gaps, branches pressed together, visible trunk |
| 6. The lights (LED models) | Turn on the lights before decorating | Make sure all sections work and the cables are hidden |
| 7. Decorating | Additional lights, ornaments, tree topper, skirt | The order matters: from lights to details |
A few details for each step:
- The stand on a flat surface. A tree that is slightly tilted at the base will look very crooked at the top. If the floor is not perfectly level, check it with your own eyes from both sides before stacking the sections.
- The bottom section secured in the stand. It is the widest and heaviest. Place it straight and make sure it stands firmly, without wobbling.
- The following sections, one by one. Take the next section, with the branches still gathered, and join it to the one below. Do not unfold the branches before stacking the section: it is easier to maneuver when gathered. Continue until you reach the top.
- Fluffing the branches. This is where most of the time is spent and where the difference between a tree that looks "straight out of the box" and a full one comes from. Start with the bottom branches and work your way up to the top. For each branch, start from the inside, near the trunk, and work your way out: first unfold the inner twigs, then those at the ends. Direct each tip in a different direction, some slightly up, some sideways, others slightly down, so that the branches fill the space and the trunk is not visible between them.
- Check from several angles. Take a few steps back and look at the tree from the front, from the side, and, if possible, from where you see it most often, from the sofa, for example. Fill the gaps by pulling the neighboring twigs toward them.
- On LED models, check the lights before decorating. Turn them on while the tree is still bare. It is much easier to fix a problem now than after you have hung the ornaments.
- Decorating. Only now do the additional lights, ornaments, tree topper, and skirt come in. The complete order is in the guide how to decorate the tree, and the quantities, by height, in the article how many ornaments and lights for the tree.
 −40%
Tasi Home StudioArtificial Christmas Tree Full 3D Versailles Green 180 cm
€215,95

 −40%
Tasi Home StudioArtificial Christmas Tree Full 3D Versailles Green 250 cm
€431,95
 −40%
Tasi Home StudioArtificial Christmas Tree Full 3D Lapland 250 cm
€379,95

 −40%
Tasi Home StudioMilan Full 3D Artificial Christmas Tree
€358,95

 −40%
Tasi Home StudioFull 3D Artificial Fir with Long Needles
€173,95

 −40%
Tasi Home Studio3D artificial Christmas tree with LED lights and snow
€673,95
 −40%
Tasi Home StudioArtificial Christmas Tree Full 3D Lapland 300cm
€545,95
How do you fluff an artificial Christmas tree so it looks full?
Branch by branch, from the bottom up and from the inside out, with the tips spread in different directions.
A few tricks that help:
- Do not skip the inner row. The twigs near the trunk are what hide the trunk. If you leave them gathered, the tree will look empty on the inside, even if it is fluffy on the outside.
- Work in sections. Fluff one quarter of the tree from the bottom up, then move on to the next. This way you can more easily see what you have done and what you have left.
- Do not arrange them all the same. Perfectly parallel branches look artificial. A few raised tips, a few left sideways give the appearance of a grown tree, not one that came out of a box.
- Come back after a day. The branches that have been packed tightly in the box will relax in the first few days, and the creases from the packaging will gradually disappear. A second quick pass will make the tree look even fuller.
What mistakes ruin the tree's appearance?
Rushed fluffing, placing the tree near a heat source, and hanging the decorations before checking.
- You only unfold the tips of the branches. The tree looks good from the front, but the trunk is visible between the branches.
- You assemble it on an uneven surface. A small imbalance at the base becomes a visibly tilted tree at the top.
- You place it near a radiator or fireplace. Direct heat is not good for artificial trees or decorations.
- You decorate before checking the lights. On LED models, a few moments' check will save you from having to take down the ornaments.
- You pull on the branches to straighten them. Shape them with short movements, do not force them.
- You throw the box. Next year you will be looking for exactly a place where the tree will fit without bending.
How do you pack away an artificial Christmas tree after the holidays?
In reverse order: take down the decorations, remove the sections from the top down, gently gather the branches toward the trunk, and put them away.
- Take down the decorations, from the top and small ornaments down to the additional garlands. Put the glass ornaments away first in a safe place.
- Remove the sections from the top down, one by one, without forcing them to twist.
- Gently gather the branches toward the trunk, roughly in the position they came in the box. Do not bend them sharply and do not crush them.
- Put the sections in the original box or in a storage bag, without bending them. On LED models, make sure the lights are not crushed between the sections.
- Store in a dry place, without anything placed on top: do not place other boxes on top of the tree.
How do you keep it beautiful from one year to the next?
Dry, clean, without pressure on the branches and away from heat; the rest is a matter of a few simple habits.
- Dust it before storing with a soft, slightly damp cloth or with the vacuum cleaner brush on a low setting. Let it dry completely before packing it away.
- Avoid dampness. A damp basement and an uninsulated attic with large temperature differences are not good places for a tree.
- Note the order of the sections, if you are afraid you will forget it: a note in the box will help you with assembly next year.
- Keep the decorations separate, in divided boxes, not hung on the branches.
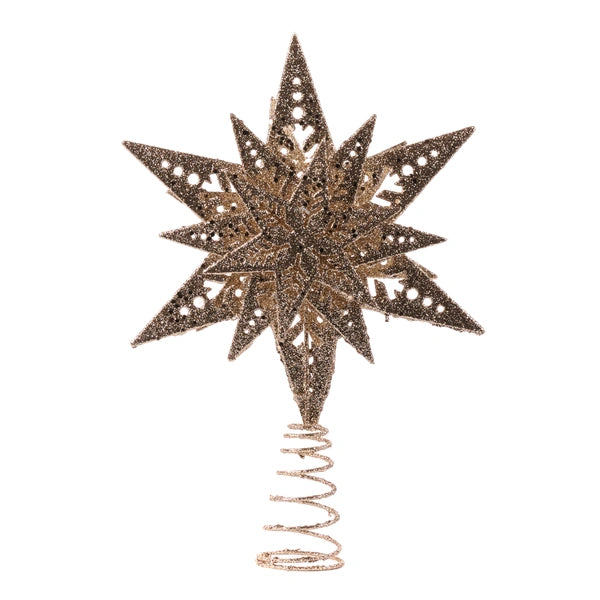
For the tree to look complete, do not forget the skirt and the topper. How to choose them according to the size of the tree is in the guides Christmas tree skirt and Christmas tree topper: angel or star, and for an extra touch of color on the branches, in the article about ribbons and bows for the Christmas tree.
 −39%
GoodwillWhite-gold velvet fir skirt
€114,95
 −40%
ShishiRed velvet fir tree skirt
€94,95
 −40%
ShishiCream jute fir tree skirt
€31,95
 −39%
GoodwillCream wool fir skirt with snowflakes
€154,95
 −39%
GoodwillRed-gold fir skirt
€114,95
 −38%
GoodwillJewel star Christmas tree topper
€25,95

 −40%
GoodwillNorth Star fir tree topper
€29,95

 −41%
GoodwillPorcelain angel Christmas tree topper
€22,95

 −36%
GoodwillSnowflake fir tree topper
€11,95
 −40%
GoodwillSilver fir tip
€23,95
 −36%
GoodwillStar-shaped fir tree topper
€11,95
Where can you find a pre-assembled Christmas tree?
In the Full 3D Christmas trees collection, with the Versailles, Lapland, Milan, and natural long wire models, in green or snow-covered, with or without LEDs.
If you prefer a pre-decorated tree, see also the decorated trees. The discounts during this period are on the Black Friday page. Delivery is made by Cargus, throughout Romania: 30 lei for orders under 500 lei and free from 500 lei. If you want to see the assembled trees and get your hands on the branches, visit the showroom, on Aurel Vlaicu St. 88A, Satu Mare, or write to us on WhatsApp at +40 741 808 090.
Do I have to attach the branches one by one?
No. On Tasi Home Studio Full 3D trees, the branches are already attached to the trunk. Join the sections from the bottom up and then unfold and fluff the branches.
How long does it take to assemble an artificial Christmas tree?
Joining the sections is quick. Fluffing the branches takes the longest, and the time increases with the height of the tree: a 300 cm tree requires more patience than a 180 cm one.
Can the tree be assembled by one person?
A 180 cm tree is easily assembled alone. At 250 cm and especially at 300 cm, it is easier with two people: one holds the section, the other fits it, and for the top branches you need a stable ladder.
How do I get rid of the new smell and the creases from the box?
Fluff the branches well and leave the tree in a ventilated room for a few days. The branches will relax, the creases will gradually disappear, and the packaging smell will go away.
Does the snow-covered tree leave marks?
A little, especially during the first assembly. Assemble it with thin gloves, on top of a sheet, and vacuum it at the end with a soft brush. Details in the article about the artificial Christmas tree with snow.
Where do I keep the tree until next year?
In a dry place, in the original box or in a storage bag, with the branches gently gathered toward the trunk and without other boxes placed on top.


